Full Article: Office 365 Step by Step Guide
Log in to Office 365 portal and go to Admin center. (VIDEO: Get started with Admin Center)

Go to DOMAINS and click on Add domain.

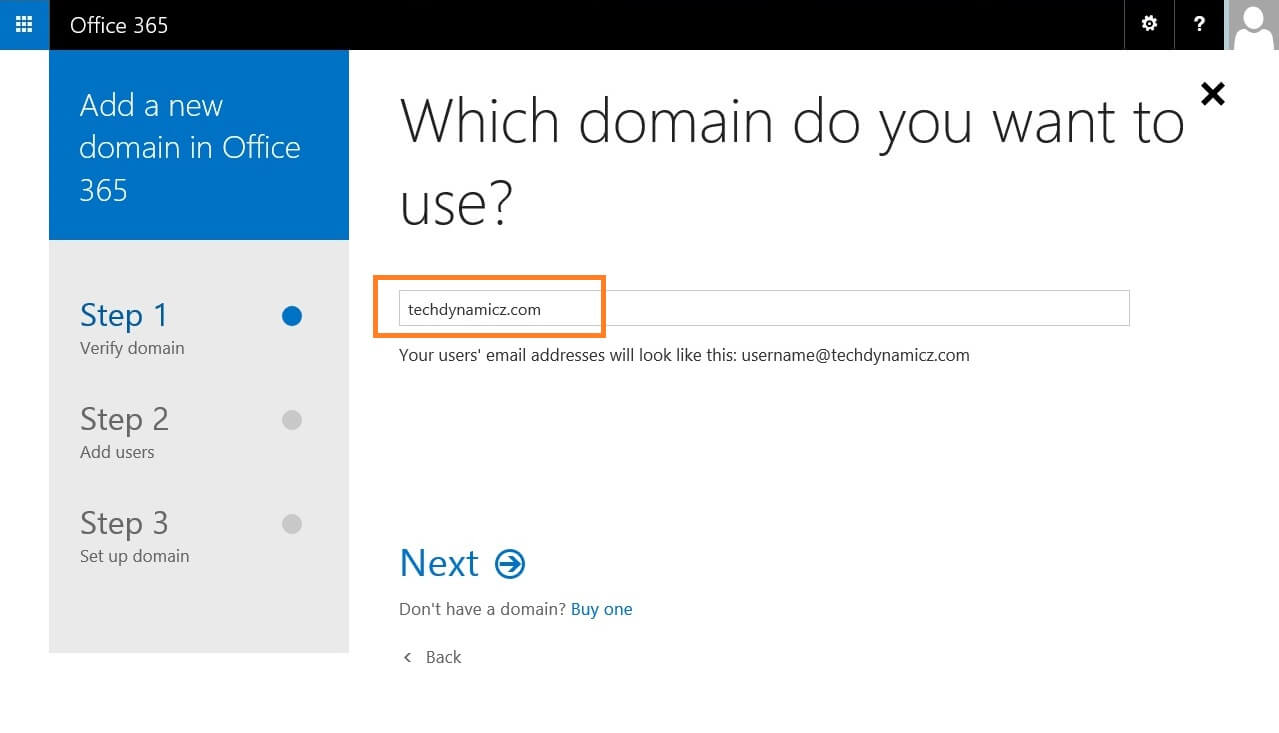
Let’s get started.

Enter you domain name here and click on Next.
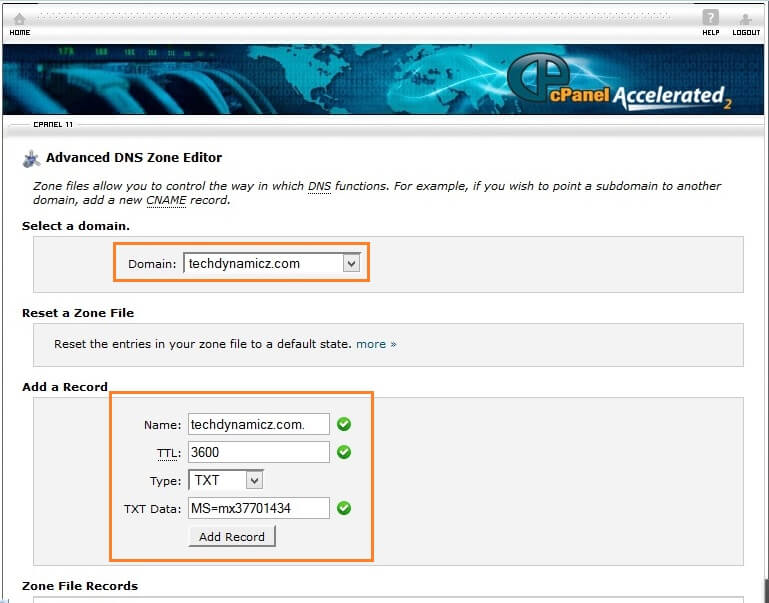
To verify the website ownership create a TXT dns record on your DNS host and click Okay, I’ve added the record. You can get the step by step instructions on how to create this record. Just click on Change and set your host provider and click Save. Then click on Step-by-step instructions for adding a TXT record.
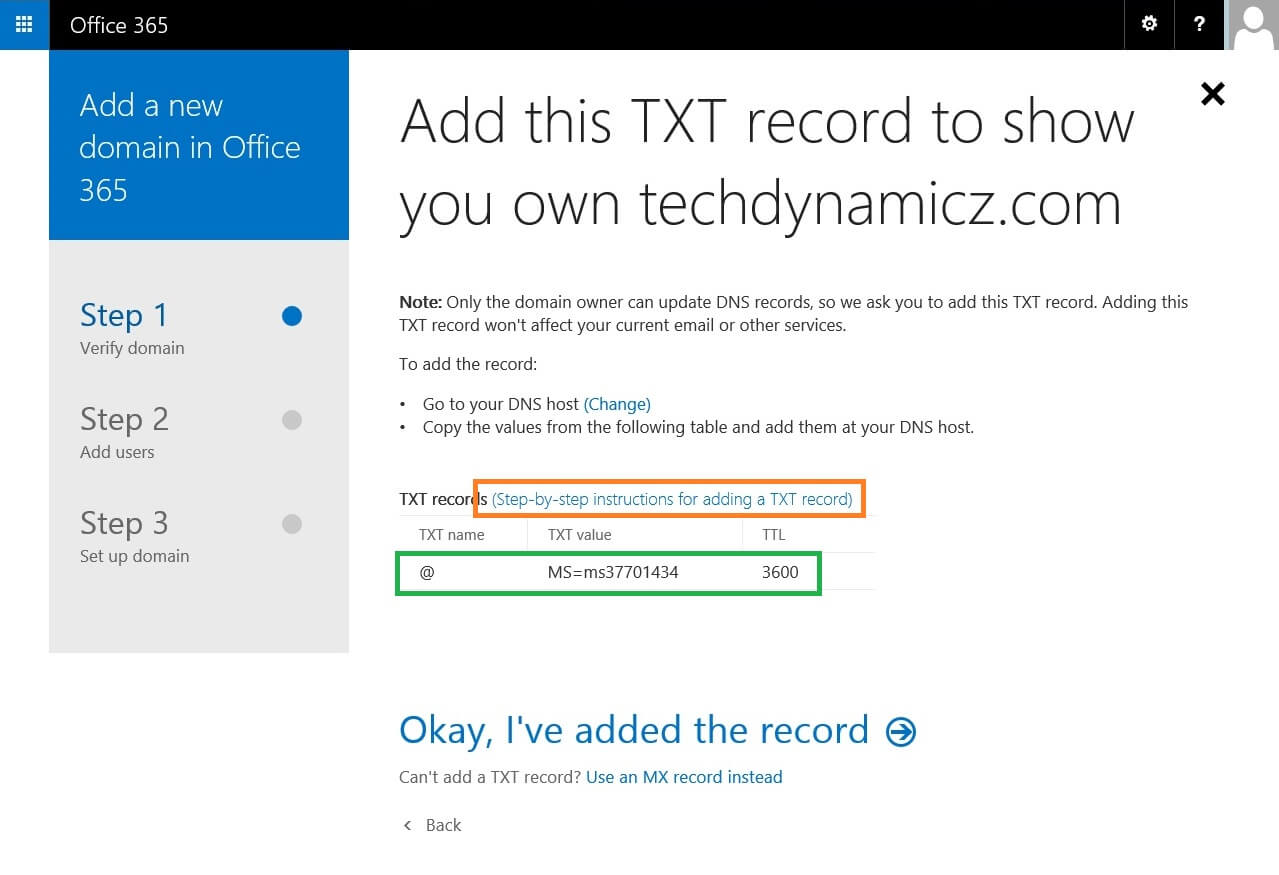 Creating a TXT DNS record.
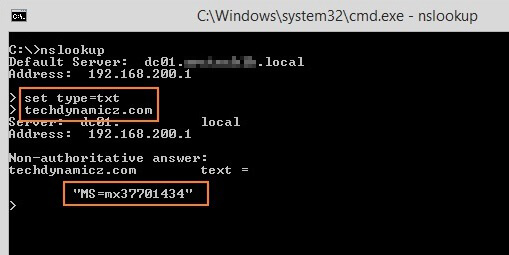
You can test the created dns record by using nslookup command.
nslookup
set type=txt
domain.com
Domain verification.

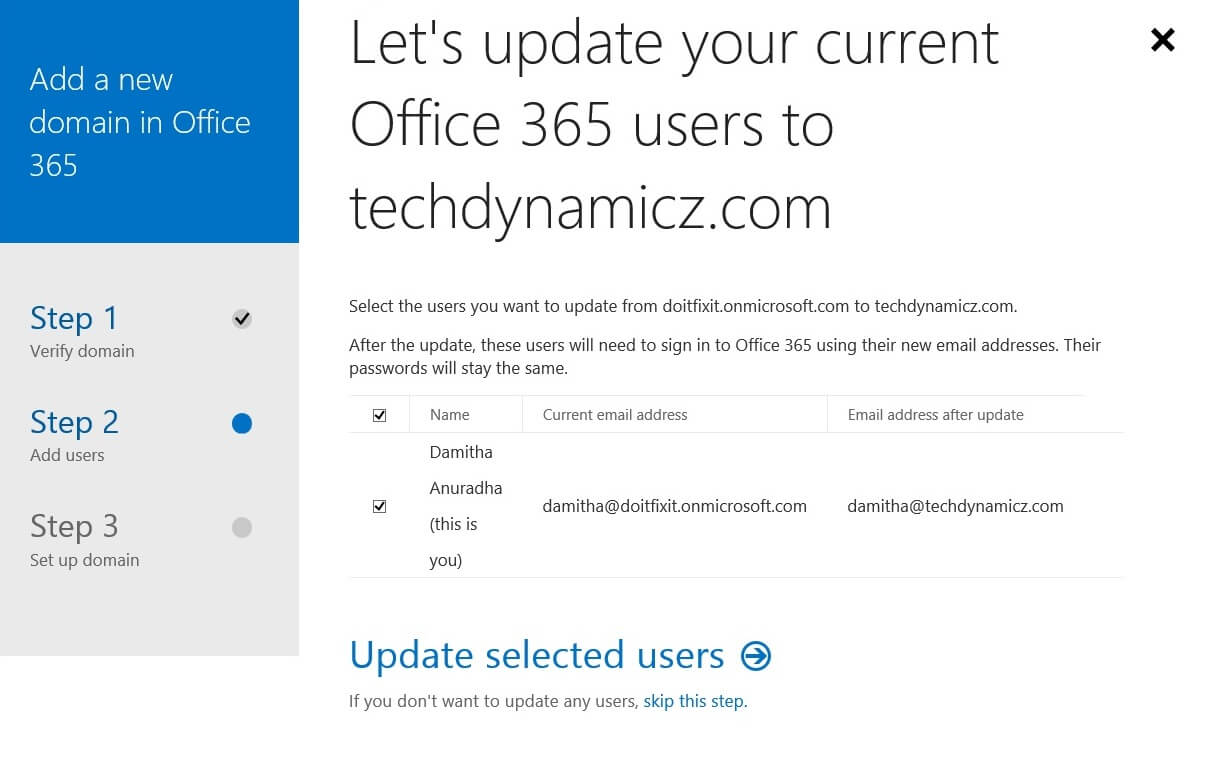
You can update current user prefixes to new domain. Just select the user accounts and click on Update selected users.
Click Next. 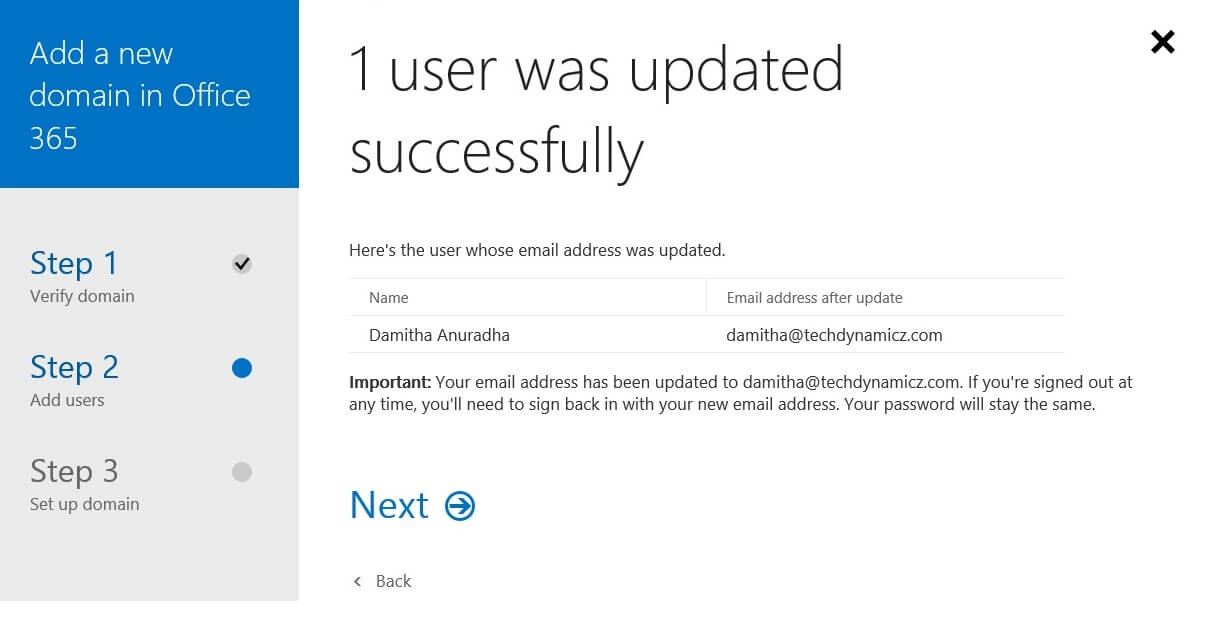
Click on Sign out. 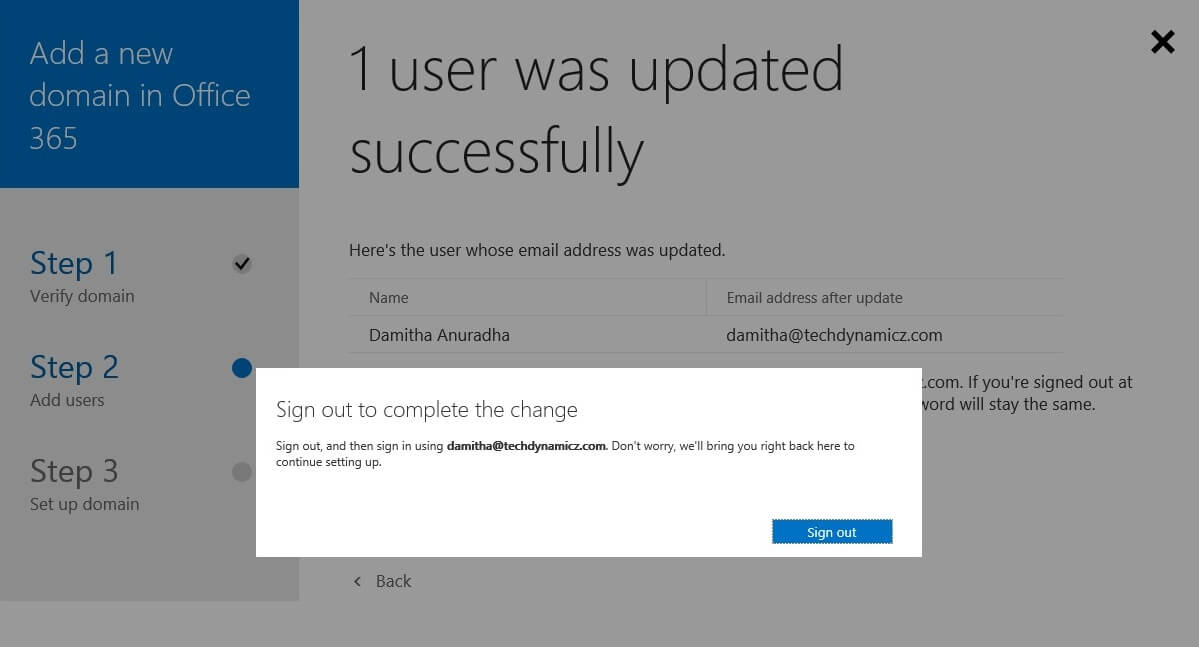
Sign in again using new address.

See the newly added domain and click on Complete setup.

Add new users.

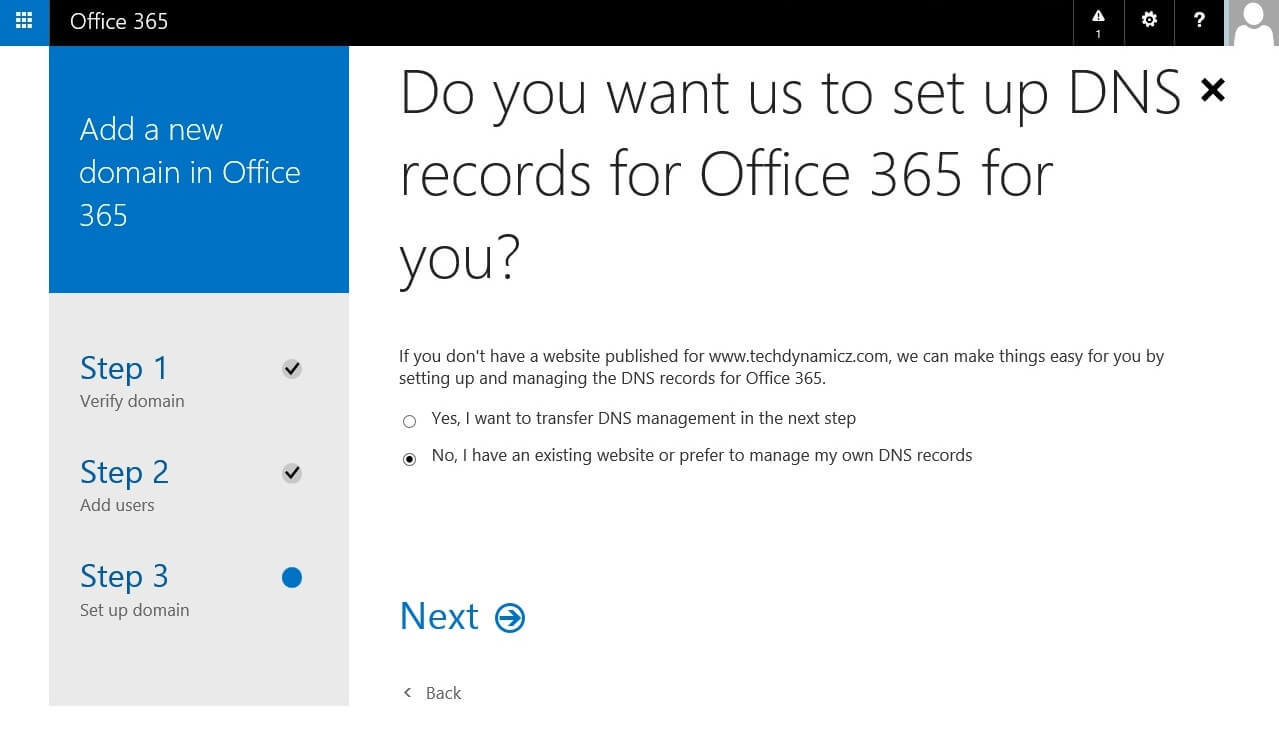
Let’s update DNS records for Office 365. Click on Next.

Choose the DNS setup option from here.
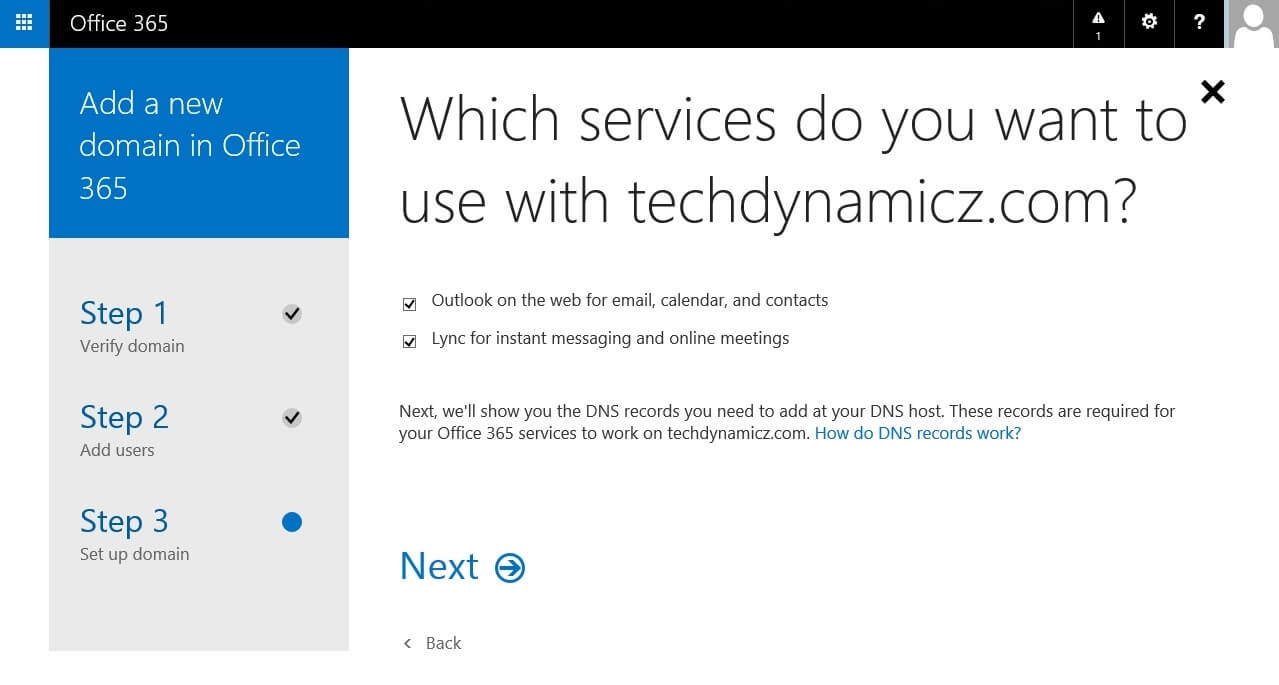
Select the Office 365 Services you are going to use with.
Adding DNS Records.

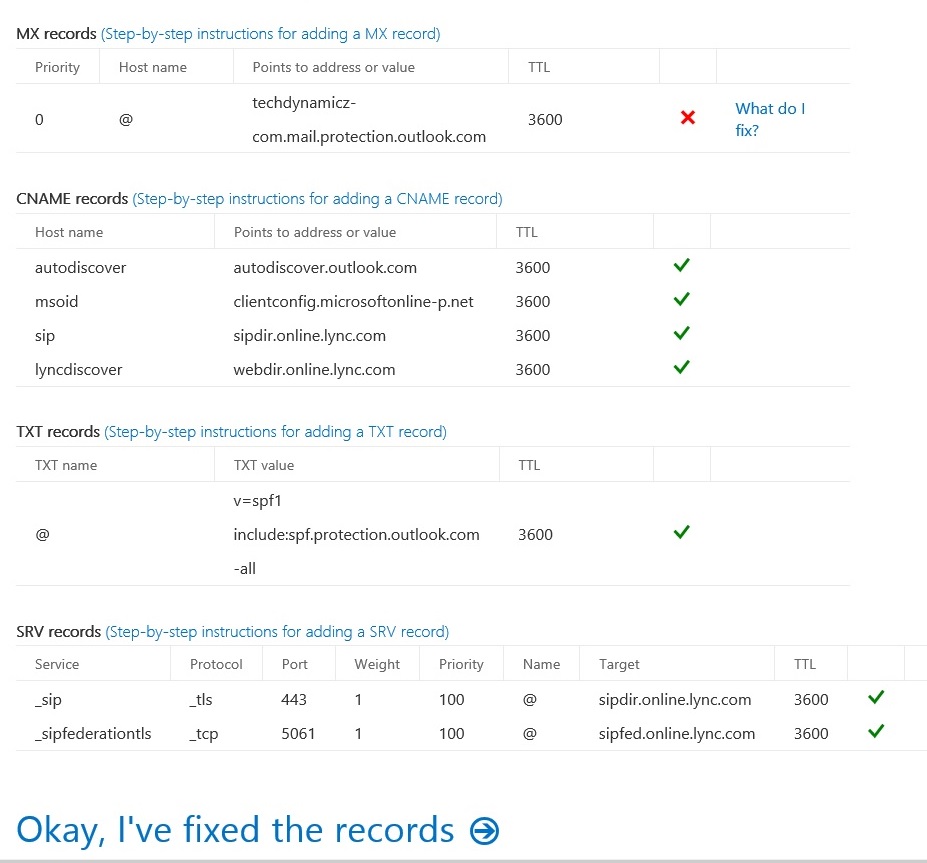
Create below DNS records and click Okay, I’ve added the records.

Then wizard will check the created DNS records and if there are any issues it will show as below image. Fix the issue and click on Okay, I’ve fixed the records. Please note that some of the DNS records will get some time to update across the global DNS servers and if you have any issue creating DNS records contact your DNS host provider.
Click Finish.

Now your new domain is added successfully and no further action is required.

Full Article: Office 365 Step by Step Guide
Leave a Reply